Best Budget Backpacking Gear for Beginners (Canadian Edition)
The first time I went backpacking, I just shoved all my kayak camping gear into a pack, which I really do not recommend, because I had a pretty bad time. As both a beginner and someone who is thrifty, when I started assembling a set of lighter gear, I found there were so many options that it was sometimes difficult to know exactly what to look for. Over time, I’ve become something of a gearhead, and I’ve learned that there’s a lot of cheaper gear that works just as well as the high-end stuff, with a little bit of extra weight as a trade-off.
When starting out backpacking, you have two options: splurge on ultralight gear, or opt for budget-friendly lightweight gear. The advantage of going with the first option is that you won’t have to upgrade later on, but the second will allow you to play around with your gear and really figure out what works for you. Over time, you’ll know exactly what you need when it comes time to upgrade, and your money will be better spent.
Factoring into this is how much weight you can safely carry. A common guideline is to carry no more than 20% of your body weight, but this can vary due to physical ability. If you have joint problems, for example, your pack weight may be much less than that 20%.
Beginner backpackers don’t need a huge gear list. This guide covers the basics:
- Backpack
- Tent
- Sleeping Bag
- Sleeping Pad
- Stove
- Kitchen Setup
- Water Treatment
- Hiking Poles
- Headlamp
Check it out: Backpacking Gear Checklist (Absolutely everything you may or may not need)
Pack
The number one rule when buying a pack is to get fitted by a professional. Go to an outdoors store and try some on, with weight in it, and make sure that a knowledgeable staff member helps you. Everyone is going to be different, and getting fit for a backpack is much like getting fit for shoes: you’ll want to put it on and know immediately that it’s the one.
The weight of your pack contributes to your total weight, so take note of that as well.
Pack Review:
My first pack was a generic MEC pack, which fit well in store but on the trail wasn’t quite right for me, so it was the first piece of gear I upgraded. I now have an Osprey Ariel 55, which I got at a ridiculously low sale price. While a bit hefty (I like a sturdy, durable pack), it’s super high quality and very comfortable. I’m a huge fan of the waist pockets and removable brain, which turns into a daypack.
Dislikes: It sits a bit high, and I can’t wear a full brimmed-hat with it.
I also have a 30L Osprey Tempest for longer day trips. No complaints; it’s an awesome pack, and I can’t recommend Osprey as a brand enough. They make great packs.
Tent
Tents can get expensive, but the main thing you want is low weight. Ultralight is best, though you can get some pretty decent lightweight options for less, especially if you’re solo.
Having a three-season tent will ensure that you’ll still be well-sheltered in adverse weather conditions and colder alpine areas. Make sure that the fly provides enough coverage to shed rain away from the structure, as well as a big enough vestibule for storing your pack.
Another consideration when buying a tent is airflow. Too little and you’ll get condensation on the inside. Too much and you’ll be cold, and it may not hold up well in poor weather.
Groundsheets can be a polarizing topic, but they do protect the bottom of the tent from moisture, which in turn helps to keep things warmer. That said, a cheap bit of plastic sheet from the hardware store works just fine.
Tent Review:
I have a North Face Stormbreak 1. It was cheap, fairly lightweight, and super durable. All round, very solid. It’s super warm.
Dislikes: There’s not enough ventilation and limited room inside. (If you’re tall, you’re probably going to have a bad time.) The vestibule is just big enough to store my backpack, but this also means it gets in the way when entering and exiting. I plan to eventually replace it with a Durston (Canadian and ultralight).
Sleeping Bag
Sleeping bags are one of the trickiest things to buy. You can do all the research in the world and still end up with a bag that’s not quite right for you. Sleeping bags are lab-tested, not field-tested. They’ll generally have a range of comfort from low to high, but depending on your physical makeup, your tent, and your sleeping pad, this can vary wildly in reality.
Down bags are warm so long as they don’t get wet, which can make them a risky buy in damp coastal regions. Synthetic bags, in turn, will remain warm when wet, but will often be heavier and less packable than down.
Backpacking quilts have grown in popularity. Essentially half a sleeping bag, quilts save on weight, though they usually come with a hefty price tag. Make sure that your quilt is paired with a sleeping pad with a high R-value.
When choosing a bag, think about how warm a sleeper you are, what seasons you intend to camp in, and how much weight you’re able to carry. A good rule of thumb is to add 10 degrees to the rating. For example, if the bag’s lower comfort rating is -15 C, assume it’s actually -5 C.
You can easily spend lots of money on a sleeping bag and end up cold at night, and unfortunately, you’re stuck with it regardless. Before buying a bag, do lots of research and check lots of reviews, but keep in mind that everyone’s experience is going to differ depending on physiology and conditions.
Sleeping Bag Review:
I have a Sea to Summit Journey Jo II, which was a compromise between weight, size, warmth, and price (on sale). It’s okay. I don’t love it, but I don’t hate it either.
Dislikes: It’s a bit on the heavier side and only comfortable above 0 C (the comfort rating is supposed to be -8, with a lower rating of -15). I plan to eventually replace it with a DIY quilt.
Sleeping Pad
The higher the R-value, the warmer the sleeping pad. You can get away with a lower R-value sleeping pad for summer, but for three-season and especially winter, you might want a higher rating, especially at higher elevations where it can be cold at night year-round.
When purchasing your sleep system, consider your sleeping pad and bag together, and what seasons and conditions you intend to camp in. While you can get away with just about anything in summer, in colder temperatures, you may not be warm enough if you pair a summer sleeping bag and pad together.
Sleeping Pad Review:
I’ve been using a Klymit Static V for well over a decade, which replaced an old Thermarest. It packs small, is thick, fairly light, comfortable, and durable. It has an R-value of 1.3, so it could be warmer, but for summer, it’s great.
Dislikes: Sometimes my hip bone ends up on the ground between one of the ridges. Due to the lower R-value, it’s cold in alpine conditions, especially in the shoulder season.
More Backpacking Articles from The Rainlander:
- What to Do If You Find Abandoned Hiking Gear
- Trail Etiquette in BC
- Real Honest Trip Reports: Black Tusk the Beauty
Stove
Since there are some pretty well-known favourites for stoves out there, this is one piece of gear that you’re probably safe to splurge on, though there are some simple and cheap options out there, too. Considerations when buying a stove should be weight, how much fuel it burns, stability, and whether it comes with decent wind blockage.
Stove Review:
I own two backpacking stoves. Since my MSR Whisperlite is 20 years old, I’ll just say I hope newer models don’t require a soccer ball-sized flame to light them anymore. Aside from the embarrassing flame requirement, it’s been an awesome stove.
I also own a BRS 300T, which pairs well with an 8-oz fuel cannister from just about anywhere. It’s cheap, small, simple, and efficient.
Dislikes: The BRS can be tippy if you don’t centre the pot just right (I have dumped my dinner in the sand after a 20 km day). You also have to construct your own windbreak. I easily made one out of an aluminum oven liner from the dollar store.
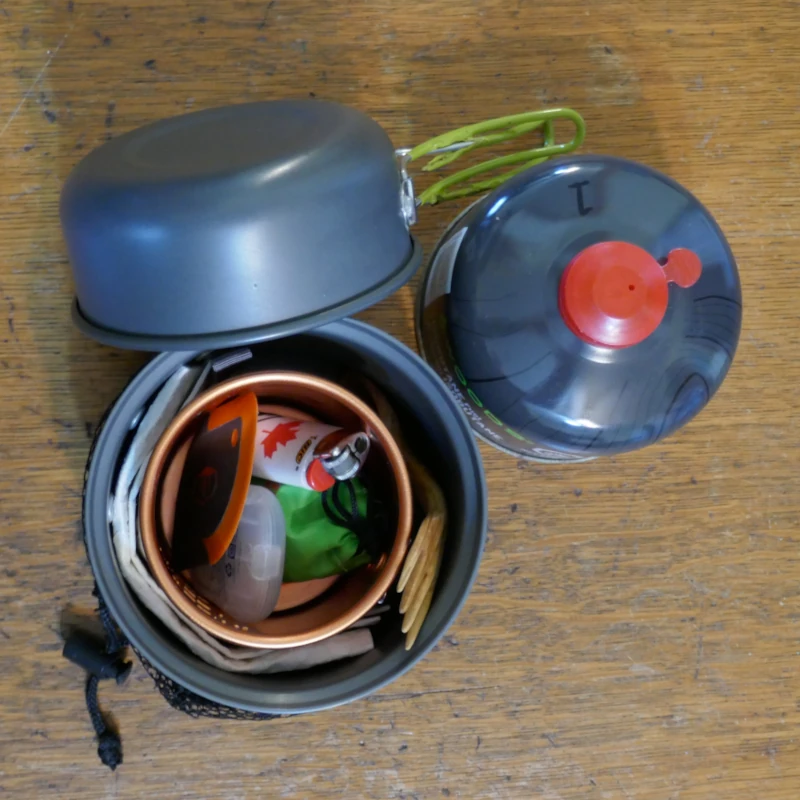
Kitchen Setup
Kitchen gear is the one thing you can cheap out on while still ending up with a decent setup. There are plenty of cheap pots out there that are ultralight. Your setup will vary depending on whether you’re solo or not, but try to put together a kit that can nest together. Make sure to check reviews and materials to make sure it’s safe for food.
When it comes to food on the trail, going with dehydrated meals helps to cut down on the number of utensils you need. Always try buying local first.
Kitchen Gear Reviews:
My setup consists of a pot, a cup, a spork, a Swedish dish towel, soap flakes, a pot scraper, a lighter, and my little BRS stove. They all nest together. Since I’m solo, I eat straight from the pot, though the lid can double as a small dish. I’m fond of the orange colour of my cup, and it has measurements on the side, which makes it easier to add the right amount of water to meals.
Dislikes: The pot handle sometimes gets hot and melts. My mug (GSI Bugaboo Cup) had a thin coating on the inside, which started coming off into my drink. I could not tell that it had this coating when I purchased it, nor was it mentioned on the packaging. While I’m not happy about having ingested plastic, I was able to scrape it off using boiling water, and I continue to use it.
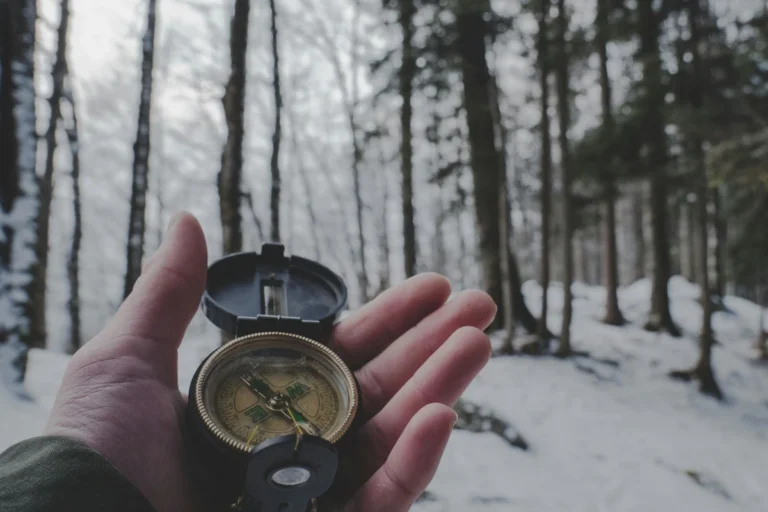
Water Treatment
There are a ton of different water treatment options out there, so what works for you will really depend on your needs. Starting out with tablets or drops is perfectly reasonable as a beginner until you figure out whether you’ll need a simple water bottle filter, a large hanging filter for bigger groups, or something in between.
Water Treatment Review:
Pristine drops have great taste, and they make a great backup option to bring along in case of filter failure. My main filter is a Sawyer Squeeze, which pretty much lives up to the hype. It’s light, efficient, and easy to use.
Dislikes: Aquatabs taste like bleach. Pristine drops take time to process (but this also makes for a nice break). MSR Trailshot stops being efficient very quickly, and I stopped using mine after one season. Sawyer Squeeze can get awkward to fill in shallow water, and tricky to squeeze into a dromedary bag.
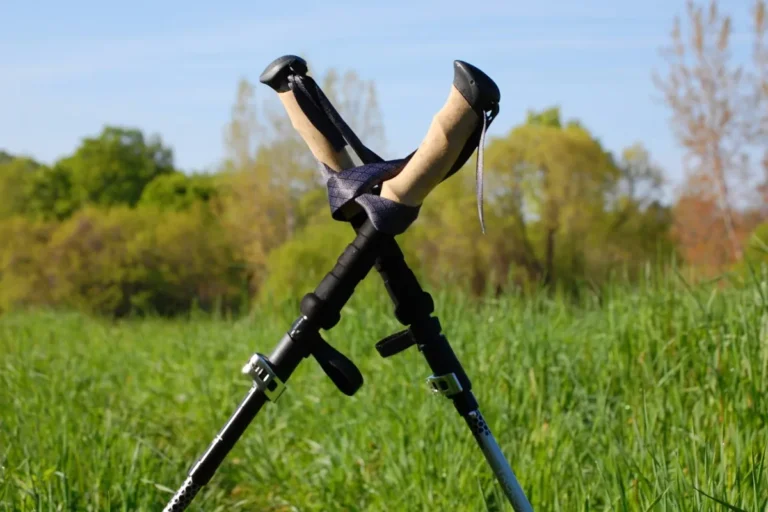
Hiking Poles
As a hiking pole convert, they’re a must-have for backpacking trips, especially on rough terrain. That said, I don’t believe in spending a lot of money on them, since there’s a non-zero chance you’ll accidentally snap one. The biggest thing to look for is that they’re light and foldable.
Hiking Pole Review:
Cascade hiking poles are the best, hands down. They’re ultralight, sturdy, foldable, cheap, and you can tighten them by hand. I also have a pair of Black Diamond poles that I found, which are fine.
Dislikes: The Cascade pole baskets don’t stay on, but I don’t use them anyway. The biggest Black Diamond downside is that they can’t be hand-tightened (you need a screwdriver or knife tip).
Headlamp
Another essential piece of gear, the headlamp looks simple, but there are a few must-haves to look for before purchasing one. Aside from being lightweight, look for one with a red light option and reliable battery life. The red light is great for middle-of-the-night bathroom trips because it preserves night vision.
Headlamp Review:
I purchased a cheap Energizer headlamp twenty years ago, and it only gave out last year. I think that speaks for itself, though I can’t attest to the current quality of their products. Though I’m currently in the market for a new headlamp, I also have a Petzl that I won in a contest that is much brighter than the Energizer.
Dislikes: The Petzel doesn’t have a red light, is heavier than my old Energizer, and I don’t see the need for several different brightness settings.
Check it out: My Lighterpack list for my 2024 West Coast Trail trip
Where to Buy Gear in Canada
Most of these retailers are British Columbia-based. There may be other large retailers in other provinces that I’m unaware of, so have a search around if you’re elsewhere in Canada, especially for online-based stores.
When buying major pieces of gear, always check out your locally owned outdoor store first. Not only are you supporting a small business, but the staff are often super knowledgeable and experienced. Next, the best place to buy gear is our two national outdoor store chains:
- Valhalla Pure Outfitters
- MEC
If you do decide to splurge on high-end gear, keep an eye out for sales. The best times of year to buy are the end of season, Black Friday, and Boxing Day. (RIP Atmosphere and your epic sales.)
Other stores that carry decent kitchen gear, clothing, and other bits:
- Bass Pro Shops (kitchen stuff, food, rain gear)
- Sport Chek (has absorbed Atmosphere and has some gear, but most locations are mainly clothing)
- Canadian Tire (kitchen items, random bits of smaller gear)
Your mileage may vary on these, but they’re a good source for specific items and random brand-name clothing:
- Big Box Outlet Store (clothing, hiking poles)
- Costco (clothing, hiking poles)
- London Drugs (soap flakes, some seasonal camping gear)
- Winners (clothing)
Lastly, for online purchases, including gear not available in Canada:
- Geartrade.ca (excellent deals on ultralight gear)
- Amazon.ca (the only place to buy a Sawyer Squeeze)
Starting out doesn’t require spending thousands of dollars on ultralight gear. The total cost of my gear setup was under $1000, and everything, including food and water, weighs in at around 25 pounds. With a bit of research and some smart budget choices, you can put together a reliable budget backpacking gear kit that will get you safely into the backcountry.
As you gain experience, you’ll start learning about what works best for you based on your needs and hiking style. Over time, you might want lighter gear, more comfort, more durability, or a mix of all three. The important thing is simply getting out on the trail and figuring out what works best for you.